New Web Site!

If you’ve managed to find yourself to my humble little blog then I need to let you know (as I thought this blog went away) that I have a new web site with a new blog.  Please check it out and bookmark it!www.heatherspencedesigns.com

There’s been a ton of fun and exciting things going on (The Blue Lagoon is finished and I’ve donated it to the Strike Out Sarcoma Auction which you can find on Facebook   http://www.facebook.com/home.php?sk=lf  did that work??) and I’m ready to share all!

~ h

The Blue Lagoon

First of all, I’ve not been at the hand applique so nothing new there.  Although it’s probably a welcome relief for you.   I was thinking of the horror of Part 4, Part 5…Part 75…Part 105…  How horrible for you!  I won’t post about it every couple inches.

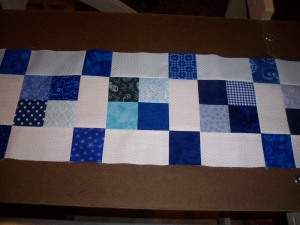
The Blue Lagoon ~ Rows 1 through 3

So here’s the first three rows of The Blue Lagoon.  I’m very pleased with the results!  Unfortunately, the quilt is so long and the room is so dark and, well, this is the best I could do.  Oh well…I think you get the idea.

The Blue Lagoon Close-Up

The background is all white.  The blues, however, are 40 different blue 2 1/2″ strips.  The effect is dynamic and I’m excited to see the completed top.  Oooo…and to get it quilted!  It’s going to be amazing!

Family Crest or I’m Crazy ~ Part 3

One day soon, I’m going to forget the title or get my “part” out of sequence.  If so please feel free to correct me!

The stitching is coming along.  Tonight, though, my husband and I decided to look for a reasonably priced hotel or B&B for a weekend so I ditched the applique.  I think it’ll be okay!

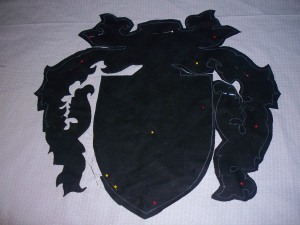
Family Crest ~ Part 3

So here it is, my friends.  What do you think??  It’s pretty amazing that I’ve gotten this far in a reasonably short amount of time.  About four hours down.  Okay, so four hours down and I’ve got about…well, we won’t be thinking about that now will we?!  ;o)

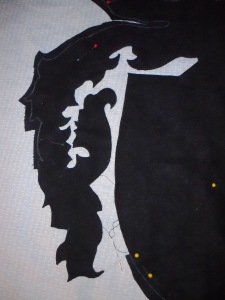
Up Close of Applique

Okay…so one little funny bump on the flat edge of the shield but that’s okay.  It could’ve been worse!

Well, then…more tomorrow!

Family Crest or I’m Crazy ~ Part 2

Maybe this project will compel me to blog daily.  As I’ve been working consistently on this project for four days now (only one of which is actual stitching) I’m not doing too badly.  And I got more accomplished last night than originally anticipated.

Family Crest ~ Black Crest on White Background

I can’t believe I’ve gotten as far as I have!  The thread I am using is by Aurifil and is working like an absolute dream.  It is really fine but sturdy.

Work Completed

I’ve got to tell you those little corners are killing me!  However, the more I do the better I got.  Really looking forward to the long lines of the shield.

Let me give you an idea of how much is to be done.  Once the black is down I’ve got purple accents to put in the swirls on the sides of the shield, gold on the shield, a grey helmet and, of course, a dog with a leash over the flat bit at the top of the crest.  Let’s see if I can get a photo of the crest…

Barnes Family Crest

There you go!  I actually did it!!  So yeah…that’s how much work is to go.  And I just realized there’s a big white spot I forgot.  Hmmm…well, isn’t that going to be interesting??

“The Family Crest” or “I’m Crazy”

Like the Rocky and Bullwinkle show.  Each show had two titles.  So does this blog.  I’ve taken a total of, oh, one hand applique class.  The results of which can be found on this blog.  They are the three quilts with four hearts on each.  Kind of a pinwheel type of quilt.  At any rate, there you go.

Last February from dear old Grandpa got married to our lovely Pat.  (She really is lovely!)  At any rate, this summer she called me and asked if I could make a wall hanging for them.  “Sure!” I replied.  I got the picture.  There’s a plate with the Barnes family crest on it.  She had scanned it in and sent it to me via Facebook.

It took me a few months to work out how I was going to get it to fit on a piece of fabric 30″ x 30″.  My concern was this:  the picture was poor as the picture was on a plate and the plate didn’t lay flat on the scanner.  All the lines were fuzzy at best.  Blowing it up wouldn’t have done the picture justice.

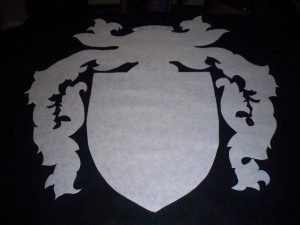
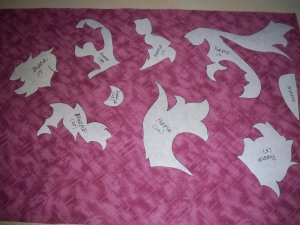
I whipped out a piece of tracing paper then pretty much guessed where the lines were to be drawn.  Then took my little drawing to Staples where they spent a grueling half hour blowing it up.  Then I traced it again onto wax paper.  This is what I’ve got so far…

Barnes Familly Crest ~ Step 1

I will then do a rough cut and put it onto my white background and hand applique it down.  Then I’ll add the purple parts…

Barnes Family Crest ~ Purple Parts

Then the gold, which I do not have ready for pictures yet, will go down.  There will be some parts that I will have to embroider (really??  I haven’t embroidered since I was a child!) some lines and such.

See…where my second title comes in?  It will, though, be stunning when it’s done.  That is, stunning if I don’t screw it up…here’s to hoping!

Who Loves Blue??

Ooh!  Ooh!  Pick me, pick me!  I love blue!!

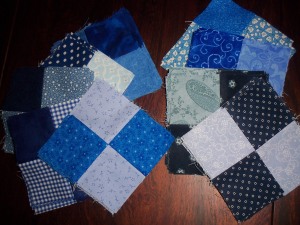
My Blue Four Patches

Aren’t they gorgeous?  This is for my Strip Club at The Wild Rose.  I’m not going to tell you the name of the quilt until it’s done but I’ve got to tell you, it’s going to be gorgeous.

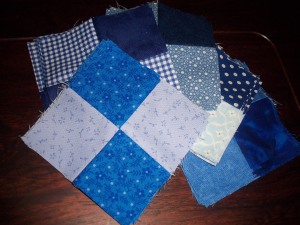
First Set of 5

They are so yummy I can barely stand it.  Here’s another pic…

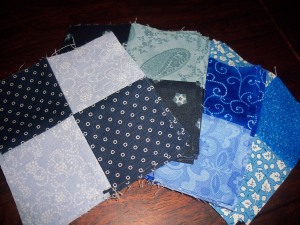
Four Sets of Patches

Don’t you just want them??  I think I’m going to have to get all those fabrics out again and have them cut more because they are simply delicious and they are going to be gone once the quilt is up and hanging.

If you are interested, call them and bug them!  Tell them, “Heather sent me!”

When It Just Doesn’t Turn Out Right

Darn it.  I hate it when that happens.  When you have such high hopes for a quilt but it doesn’t turn out quite right and you can’t see it until you are nearly finished.

I was on a time crunch of sorts and the quilt was for the shop, not for me, which makes it very different.  If it been for me or a gift I was giving away I would’ve taken it apart and changed a few fabrics.  But, alas…

Ugly Quilt

The fabrics all on their own are quite beautiful and, with the exception of the stripe, are all from the same line.  However, I should’ve left the black out.  Either that or placed them better, probably should’ve had one more square, and made one of the borders black to tie it in.

But now it’s hanging in the shop! (argh!)  A constant memory that it just didn’t turn out as well as I had hoped.  Oh well!

But it brings me to the next two quilts I’m working on…

My Five Pointed Flowers

Okay…so I keep telling myself to come up with a better name but it just ain’t happenin’!  If you have a suggestion I would love to hear it.

All right, the quilt:

Shirley's Quilt

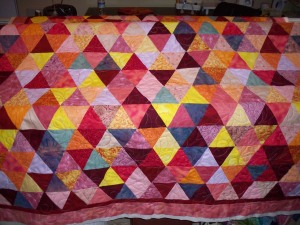
Here it is finished.  There were quite a few batiks plus the back was a beautiful batik.  I wanted to come up with a quilting design that suited the quilt.  However, this quilt has been intended for a baby.  The size of the quilt is close to a lap quilt so…what to do??

I came up with my Five Pointed Flowers:

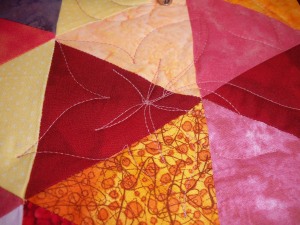
Five Pointed Flower

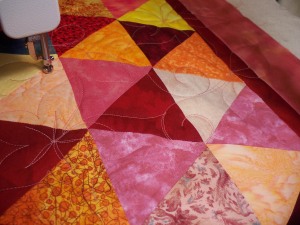
There’s also swirls and flowers…can you see them in this pic?

Five Pointed Flower Up Close

Oh yes…that’s a good photo of the swirls.

Here’s the story:  My dear customer, Shirley, brought this quilt to me.  Her mother had been working on it but, when asked what happened to it, she said she threw it out.  Shirley managed to get it before the garbage truck arrived (literally, it was in a bag by the garbage can).  She pulled it out of the rubbish, finished some of the seams and added a border.  That is when she brought it to me.

As it turns out her mother has macular degeneration (upon further research it has become apparent that I don’t want to have this when I get older) therefore making quilting a difficult, if not impossible task.  They both feel quite sick at heart that this may be her very last project.  I was very honored to finish it for her.  Several of us tried to convince Shirley have her mom keep it but…well, we shall see what happens.

A Thought About Borders

If I had a dollar for the amount of times I’ve heard, “I just need to throw the borders on!” I would be a rich woman.

Often times we spend more time and care in picking out fabrics and piecing the body of the quilt that we neglect to pay particular attention to the borders. It’s the last step and almost an afterthought. How hard can it be?!?

When putting your borders on do you cut a few strips then, starting at one end, stitch right down the side to the end of the quilt? Then repeat process with the other three sides? Ah yes, the result is that of ruffled borders and you may not even realize it!

Borders that ruffle can be a longarm quilters worst nightmare. That may seem like an overstatement. However, when fabric doesn’t lay flat that is when puckers and tucks occur. When you hire a quilter to do your quilting, they often want to do a good job for you. Anything you can do to make their jobs easier is always better!

What does a quilt with ruffled borders look like? When your quilt is laying flat on a bed do the borders lay flat or do they have a wave to them? Is the wave really pronounced?

With a slight wave the quilt top will stretched and little and the wave would, most likely, stretch out. A very distinct wave will never stretch out.

I once had a customer bring a quilt to me that her mother had made in the ’20s. My customer, now in her ’80s, wanted to make the quilt larger for her granddaughter so took a yellow sheet, cut it into strips and then sewed it to the “edges” of the Grandmother’s Flower Garden. When I quilted it there were huge tucks (as in several inches). She was okay with it but it made my heart sick.

To properly put a border on your quilt first measure the side you are going to be working on.
Second, measure your border fabric and cut it exactly the size of the quilt side.
Fold your quilt top in half and mark (either by pinning or pressing) the middle of the quilt. Fold each half in half and mark (either by pinning or pressing the quarter sections of the quilt.
Repeat the marking process with your other borders.
Pin the border to the side by matching the middle and quarter marks and stitch in place.
Apply the sides first then the top and bottom. Or top and bottom first, then the sides.

Why doesn’t the first way work?
When you are stitching your border fabric to your quilt top and it is not pinned down you can (and most likely will) pull the border fabric just enough to give it that wave. The times I’ve reapplied borders in this condition I’ve trimmed off anywhere from a half inch to four (!) inches. No kidding! The stretchier the fabric the worse it will be.

The moral of the story: Borders are a very important part of your quilt. Putting them on properly will ensure a prettier quilt!

Happy Quilting!

Possibilities

I’ve just finished my heart healthy smoothie.  My breakfast is bubbling happily on the stove.  The littlies are upstairs getting ready for their day.  And I type.

The sun is shining, although it won’t last long.  Sometime over night it rained and everything is wet and rain-droppey.  Giant drops of water hang like ornaments from the empty tree branches.  A decoration in their own right.

As I lay in bed this morning I started thinking about the possibilities quilting holds for me.  Not just new quilts.  Although that just sends my mouth watering and fingers itching.  With my fabric not easily accessible I often head to the fabric store to let my imagination run wild.

The possibilities are such things as classes to be taught.  Patterns to be created.  Should I sell items or not?

I’ve managed to pare my schedule back by quitting one job and canceling all my teaching engagements at another shop.  The first job was too far and the hours were too little.  It served it’s purpose for a season but now it’s time to move on.  The teaching engagements, well, that wasn’t really worth it either.  The most I ever had in a class was four people.  The shop didn’t know what my classes were about (despite the description I handed to them) and they didn’t promote the classes.  Very unsatisfactory!

But now, I’ve got three days a week at my studio for customers and creating.  Two to three days a week at the quilt shop for all those classes plus people who know what I’m about.  It can’t get any better than that…can it?

Slowly life is coming into focus and I’m excited to see what it has in store.

Oh!  An orange cat prowling outside and my breakfast is finished!

Happy Morning to you!

~h